For a SaaS accepting payments globally, card fraud costs more than the stolen amount: every chargeback carries an extra dispute fee, and a high dispute rate can trigger a Stripe account review — or a freeze. Radar is Stripe's built-in machine-learning fraud engine. This guide is a ready-to-use configuration playbook: the base toggles, which plan to pick, copy-paste custom rule code, and the frontend defenses that complete the picture.
1. Base Settings
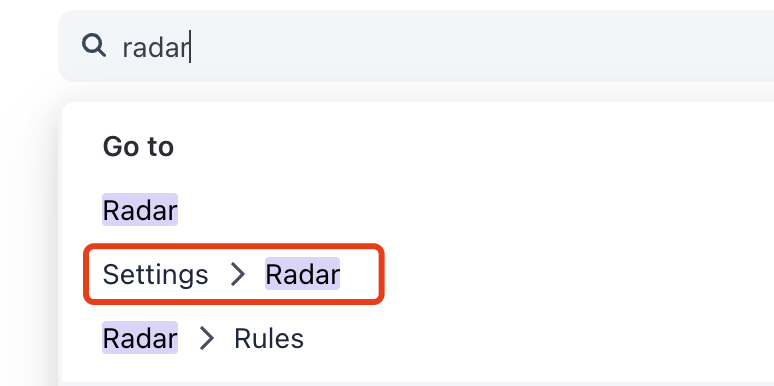
Open Settings → Radar in the Stripe Dashboard and check two toggles first:
-
Use Radar on payment methods saved for future use
-
Recommendation: keep it ON (it's on by default — don't click Turn off).
-
What it does: Radar also screens card-saving/verification flows (SetupIntents API, no immediate charge). Attackers love card-saving endpoints for card testing precisely because no charge happens and nothing looks suspicious — this toggle closes that door.
-
-
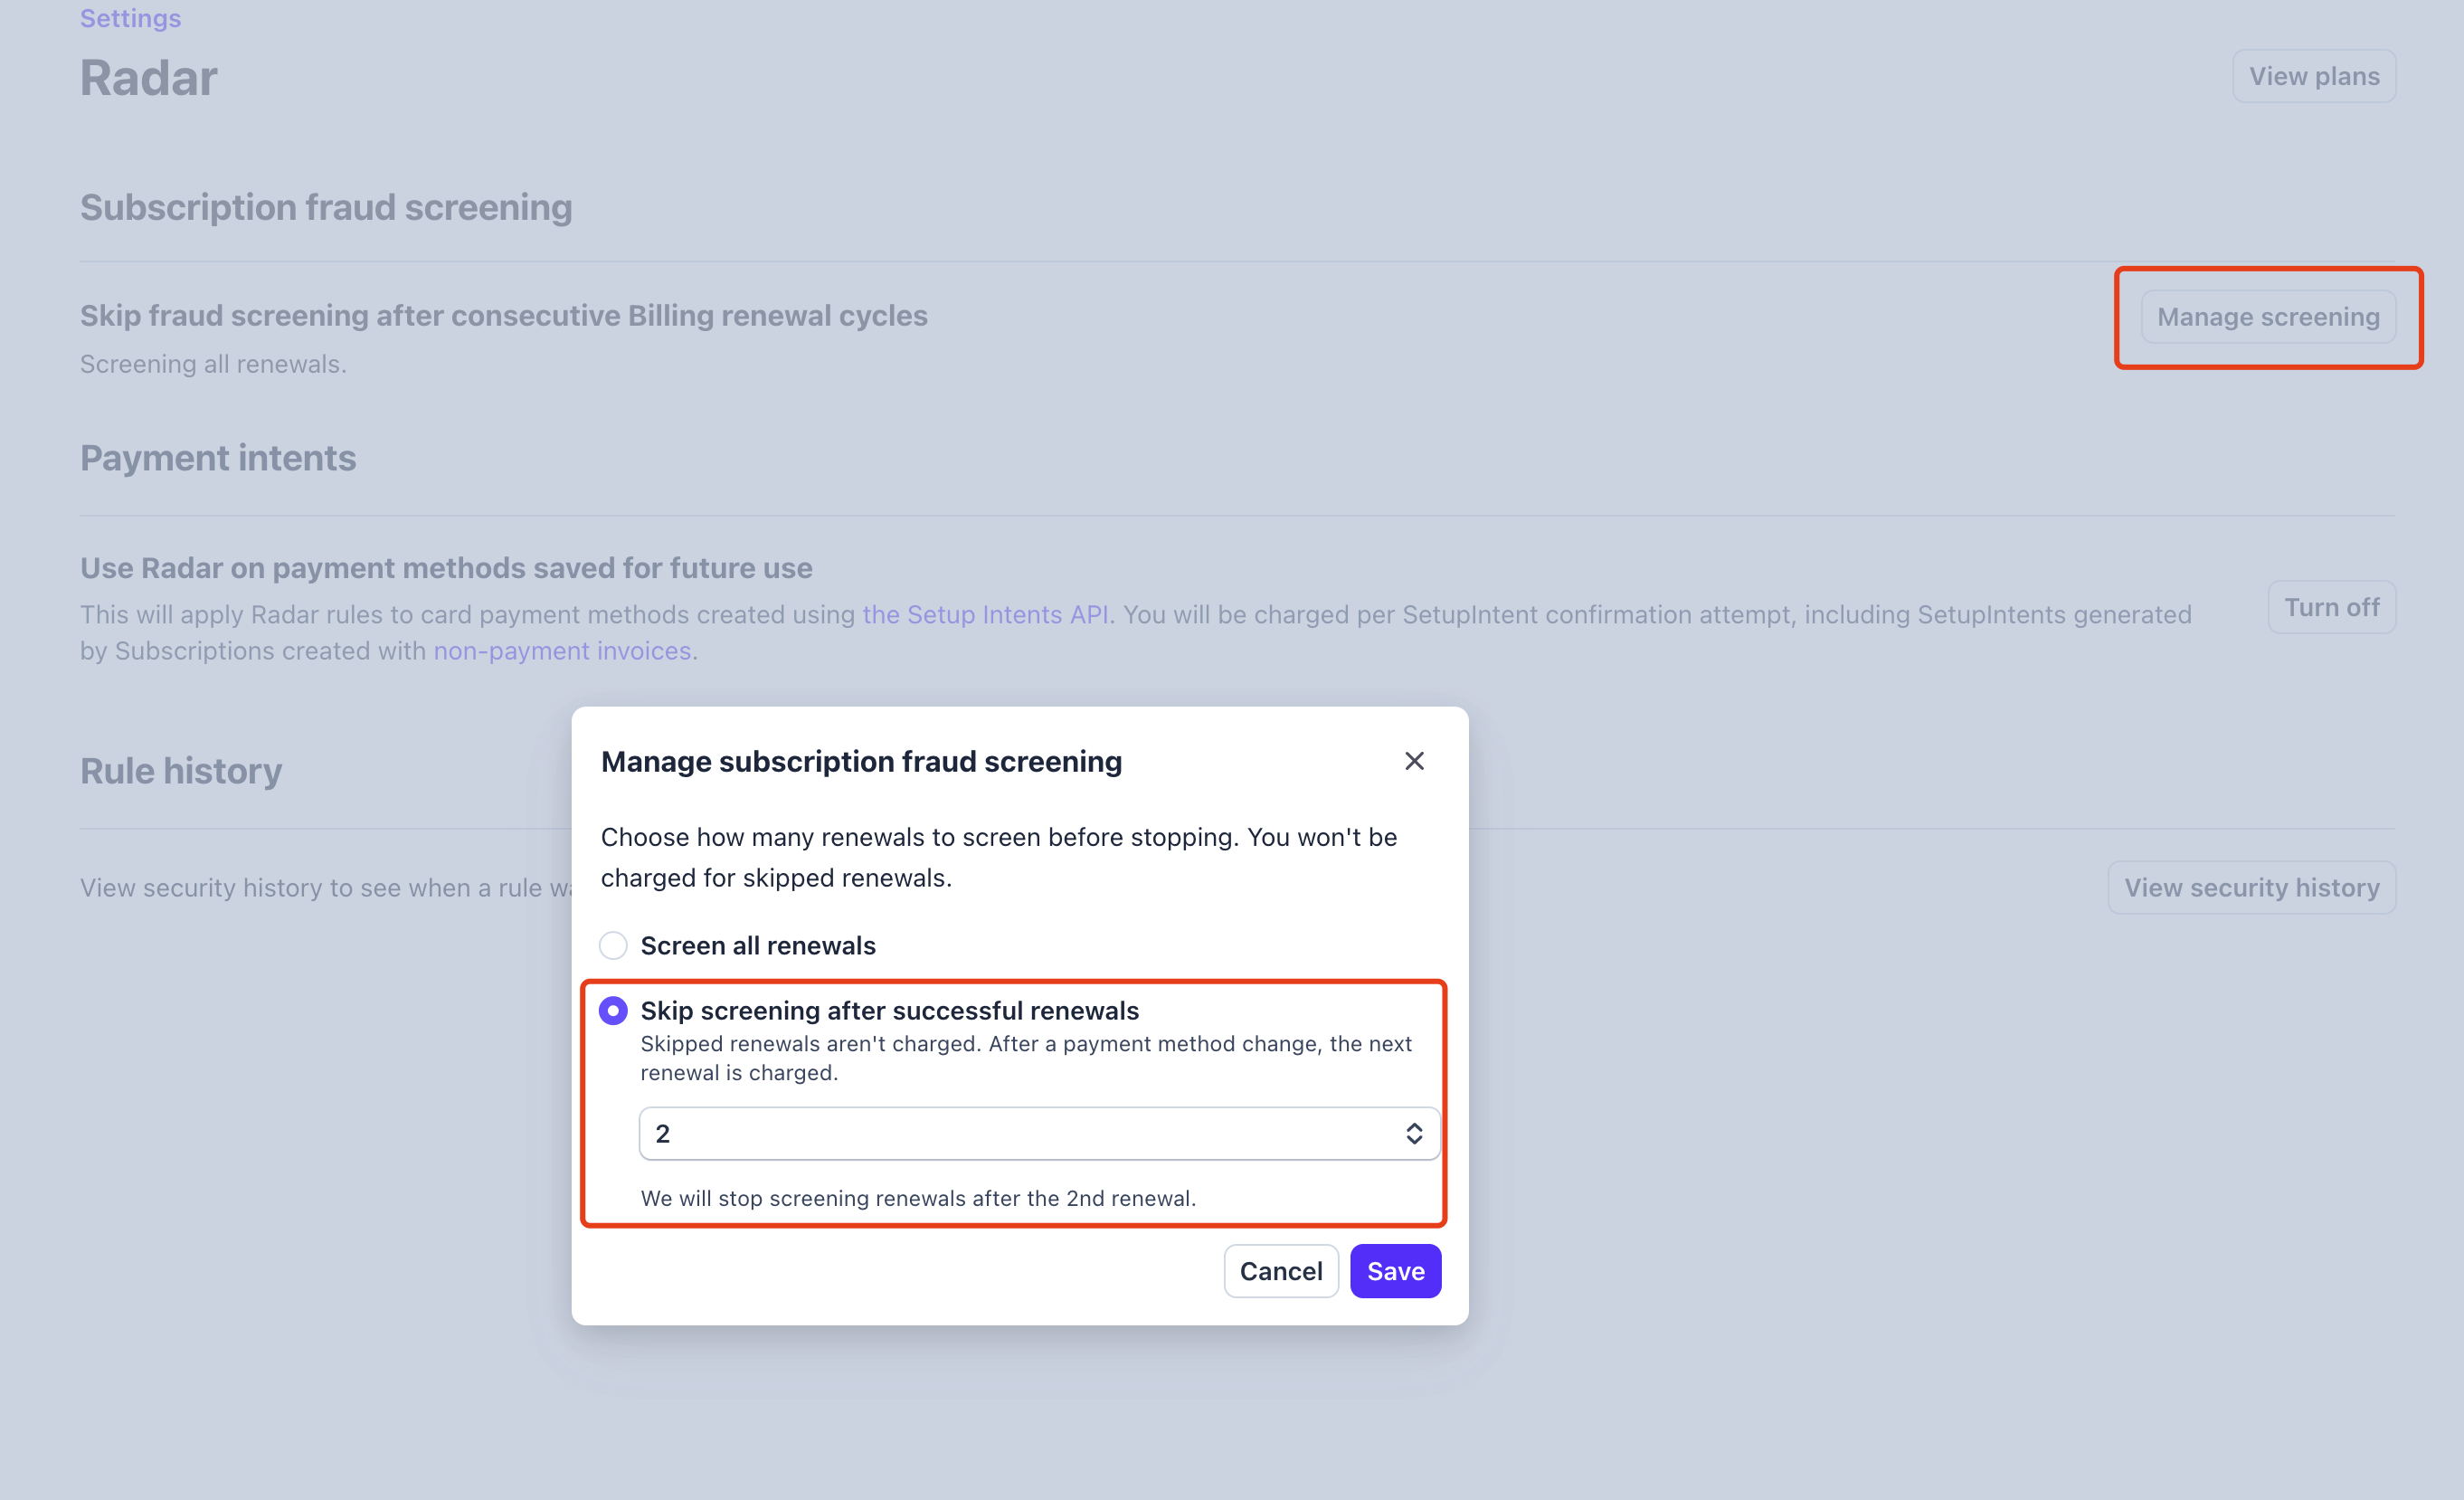
Subscription fraud screening
-
Recommendation: click
Manage screeningand fine-tune it. -
What it does: If your business has subscriptions or recurring charges, set it to skip screening after 2–3 consecutive successful payments. Customers who have renewed several times are extremely low risk; skipping them saves Radar's per-screening fees and prevents a false positive from suddenly failing a loyal customer's renewal.
-
2. Core Rule Configuration (Radar → Rules)
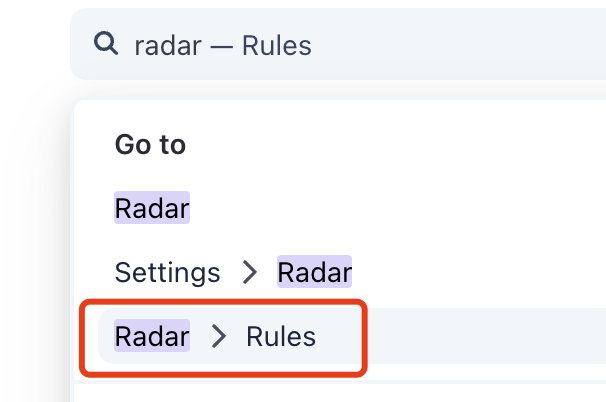
Blocking and verification rules live on the Radar → Rules page:
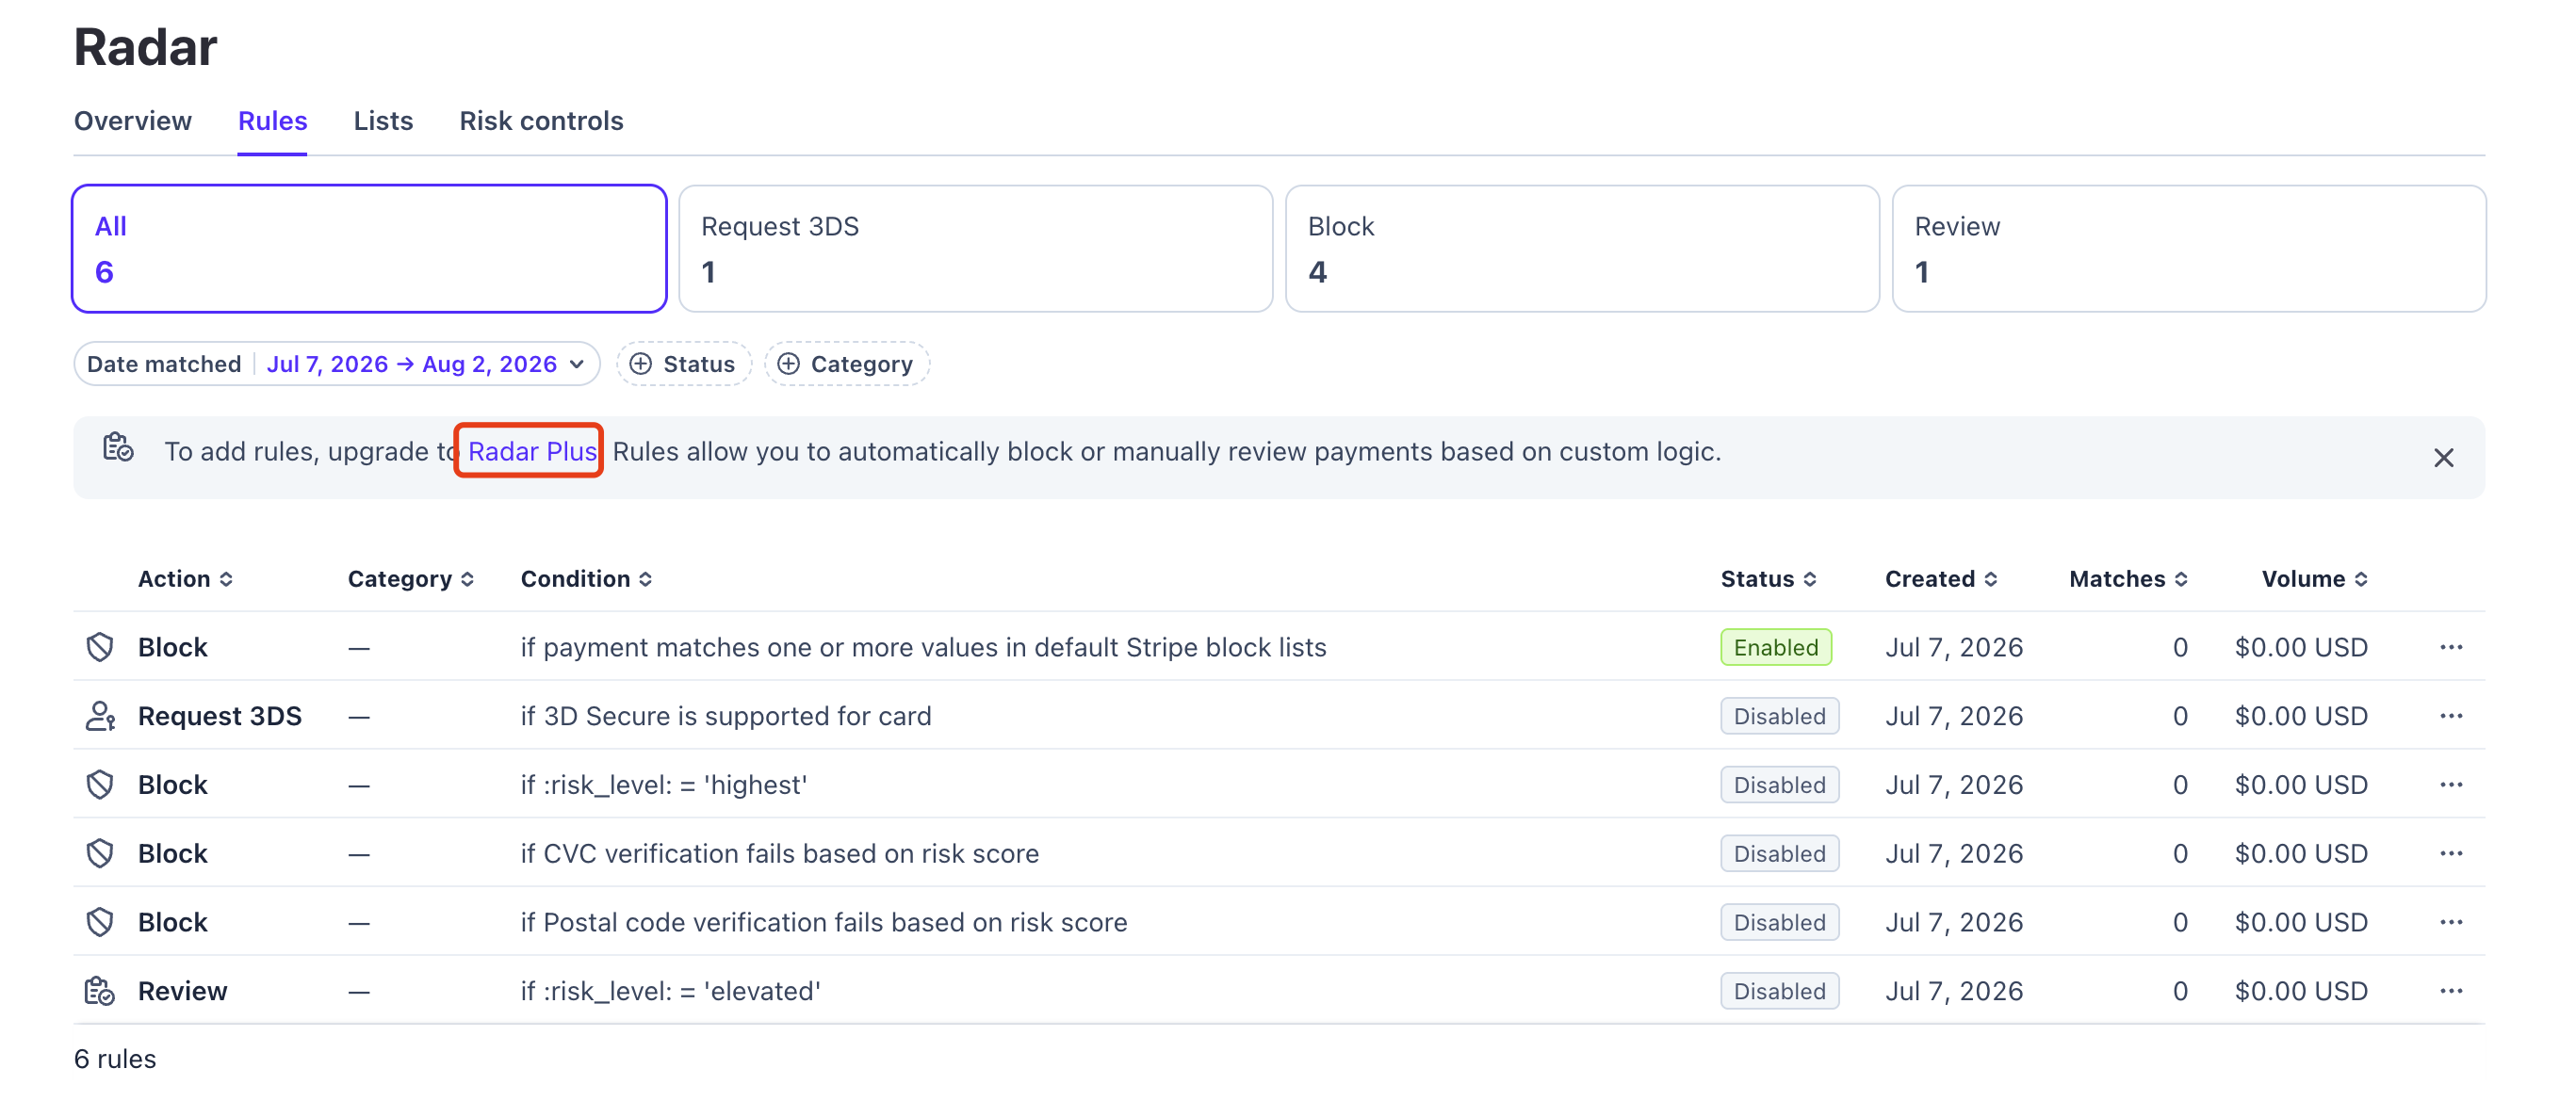
Adding custom rules requires upgrading your Radar plan — Plus is the one to pick.
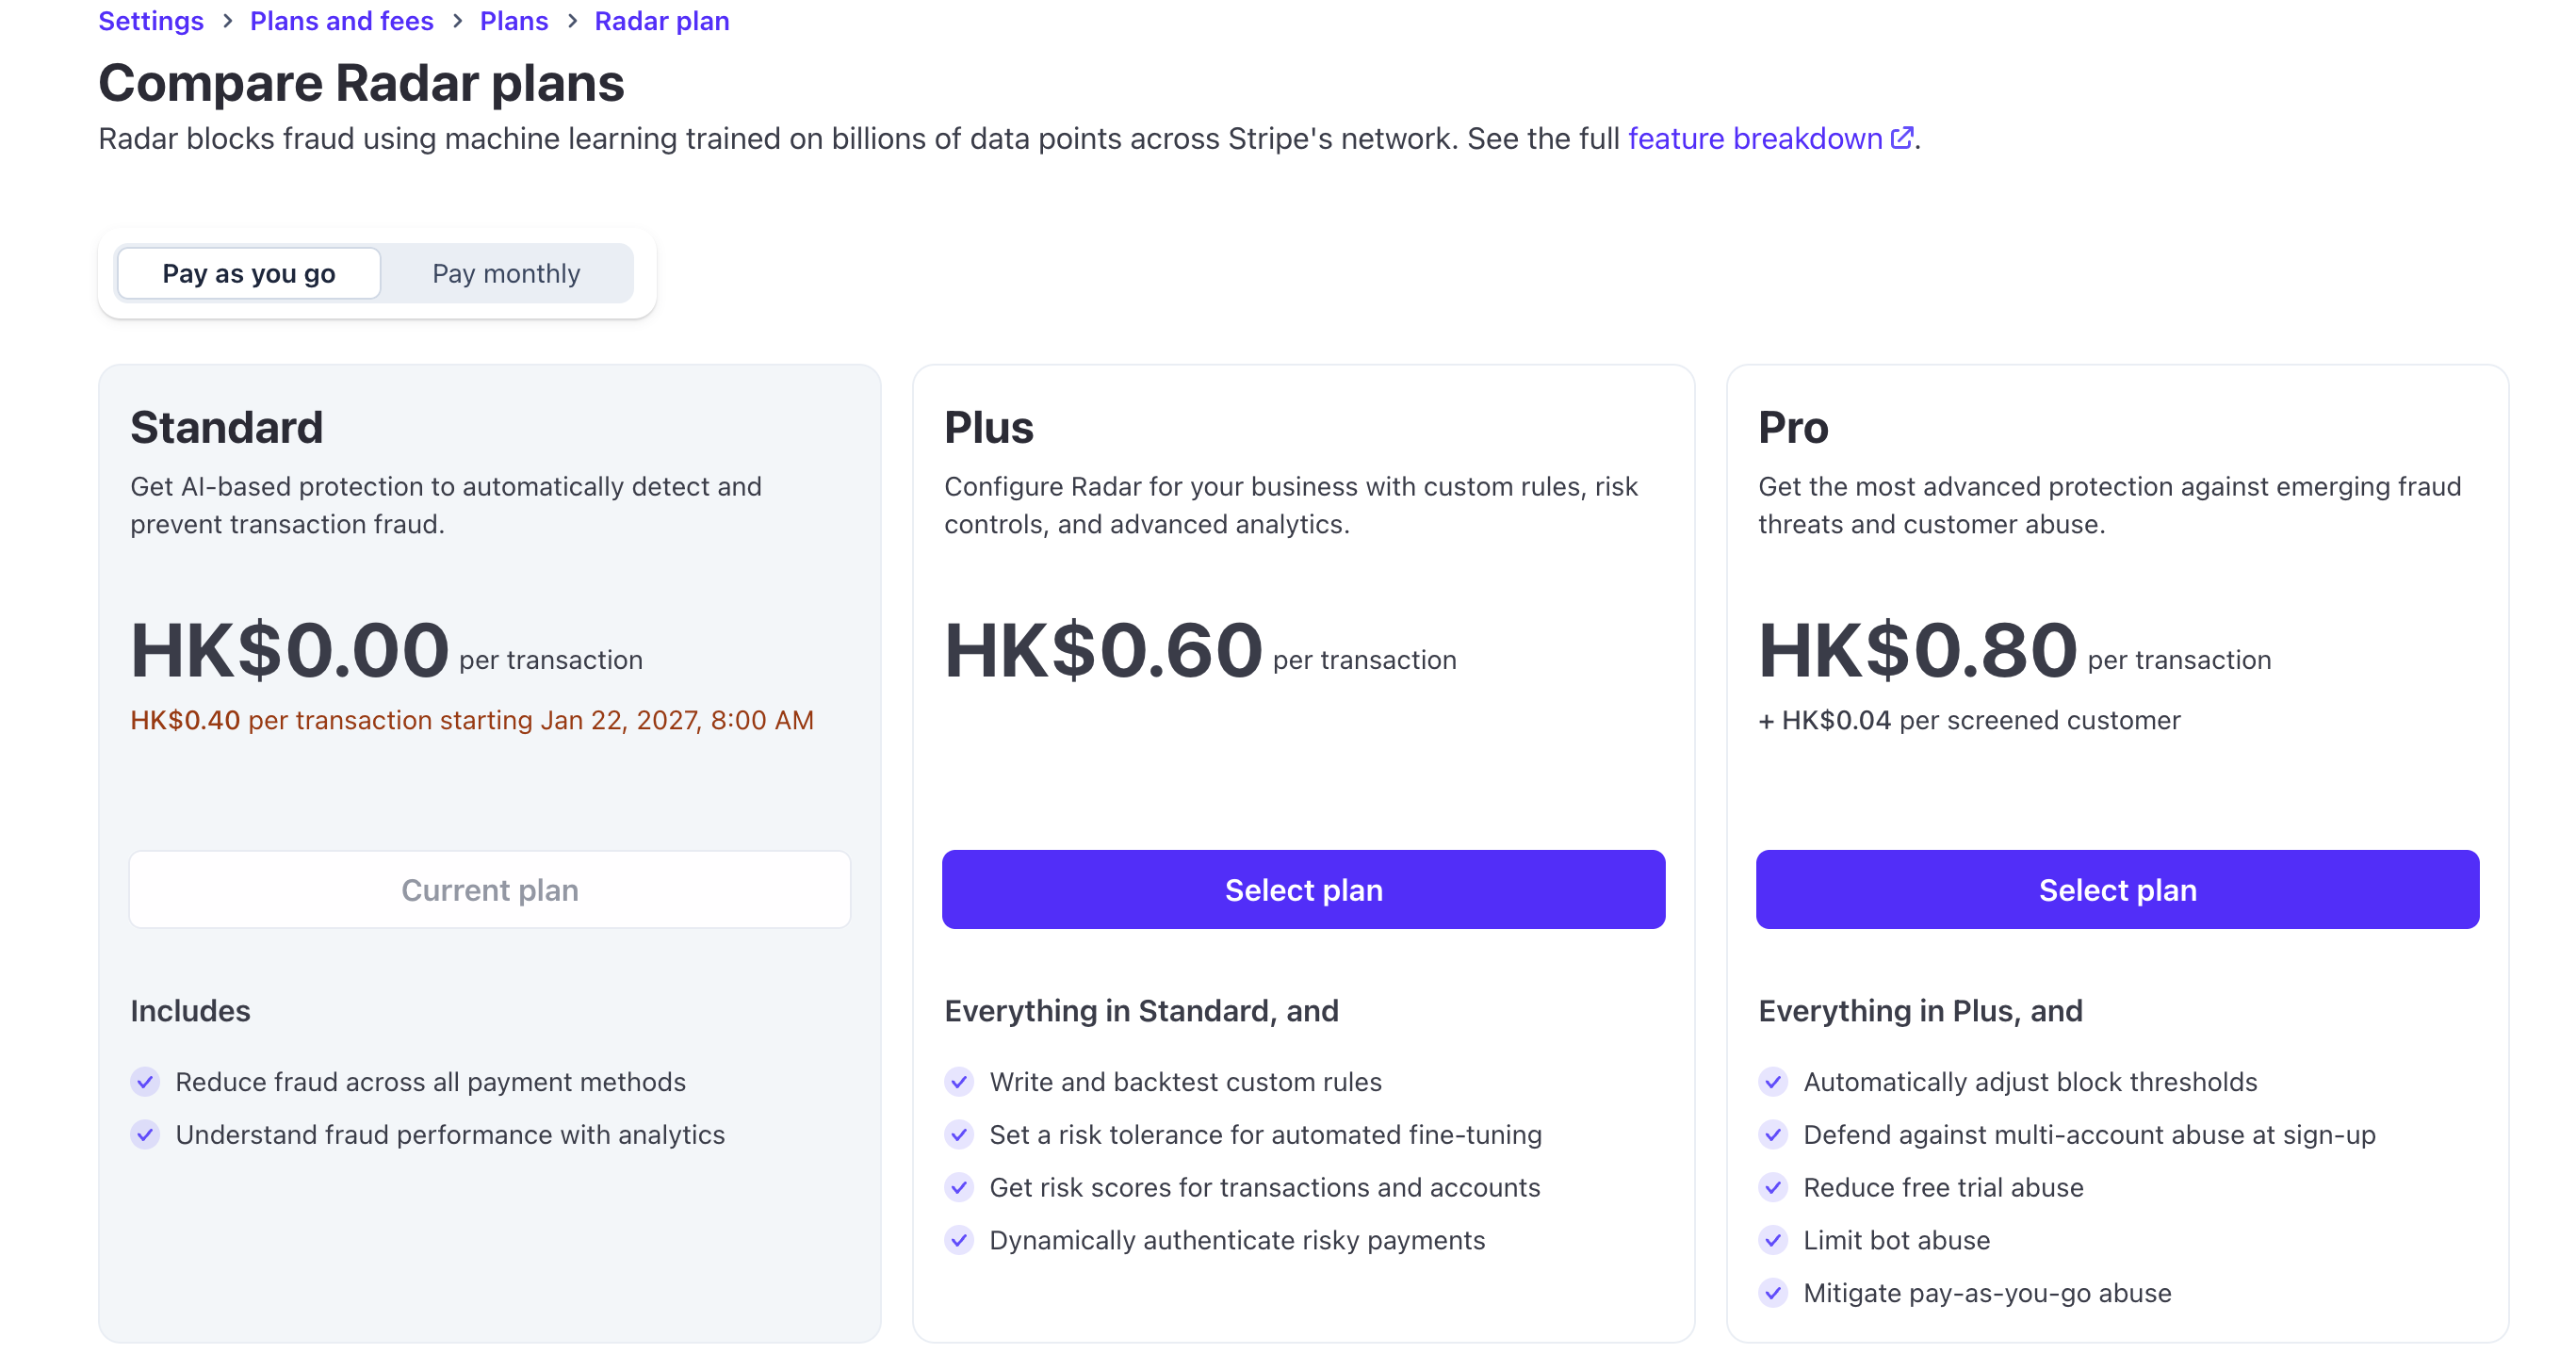
Why Plus?
Looking at the feature matrix, Plus is the cheapest tier that supports custom rules — the key line item is Write and backtest custom rules. Once upgraded, you can add everything below: forced 3D Secure, CVC blocking, cross-border IP blocking, and more.
Plan Comparison
Note: the screenshots show prices in HK$ because of the account's region. Actual pricing varies by country, but the comparison holds.
Plan | Price | Best for |
Plus ⭐ (recommended) | HK$0.60 / transaction | If you need to write your own rules, this is all you need. Custom rules, per-transaction risk scores, dynamic 3DS, and more. |
Pro | HK$0.80 / transaction + HK$0.04 / screened user | Only for large SaaS businesses with serious abuse problems (bot-driven free-trial farming, automated endpoint abuse). |
Standard (default) | HK$0.00 / transaction | Relies entirely on Stripe's automatic AI blocking. No support for adding or editing rules manually. |
Billing Mode
The toggle at the top left switches between Pay as you go (per-transaction) and Pay monthly (flat monthly fee):
-
Low volume / just starting out: stay on the default
Pay as you go— you only pay when transactions happen. -
Very high volume: run the numbers on
Pay monthlyto see if the capped monthly fee comes out cheaper.
Enable the Default High-Risk Rules
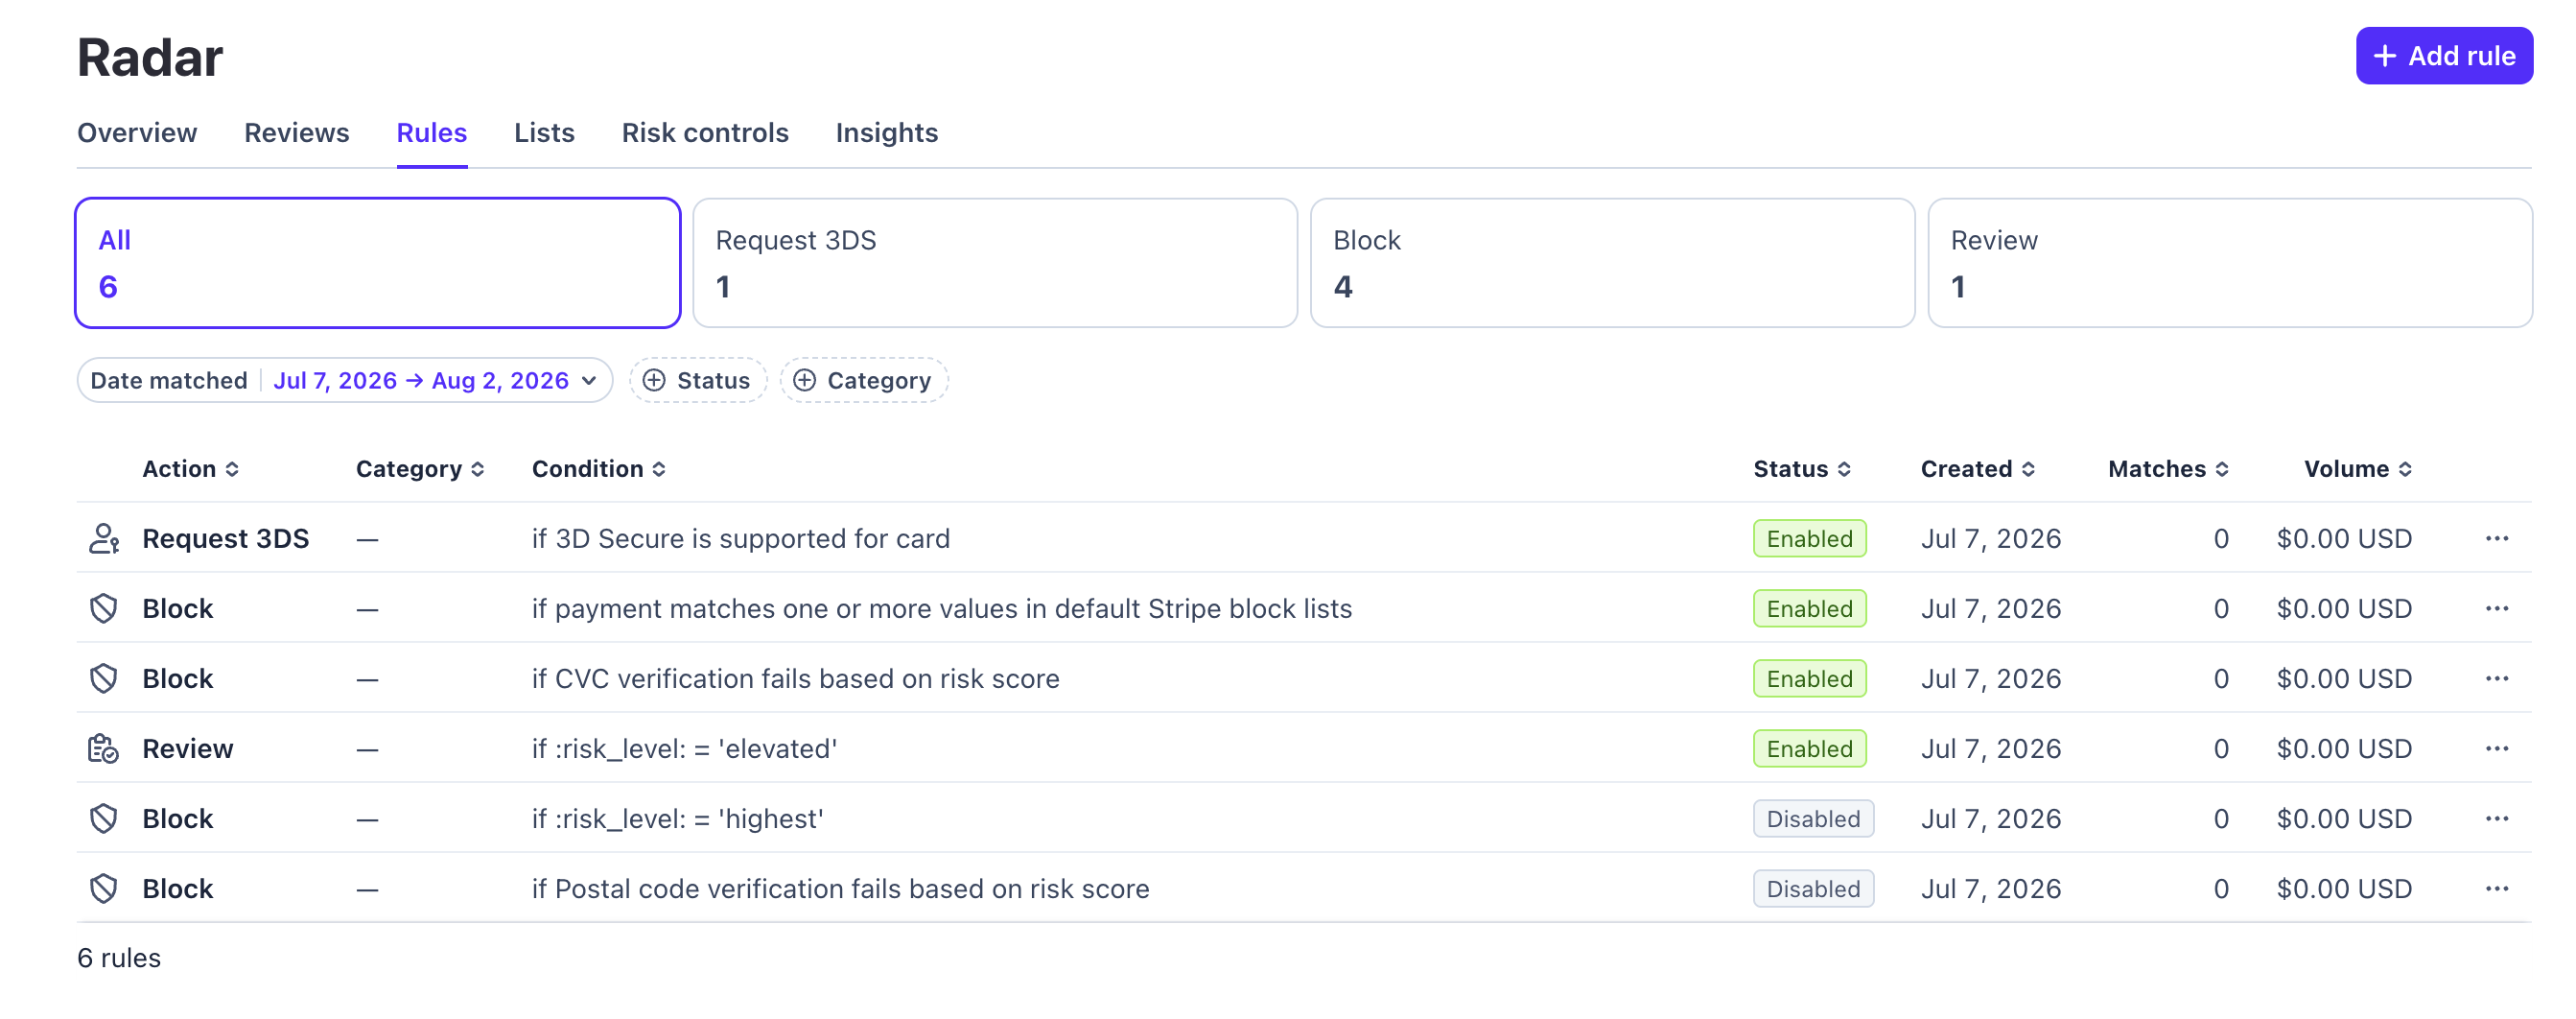
After upgrading, go back to the Rules page and enable Stripe's built-in high-risk rules first:
-
Block if :risk_level: = 'highest'→ [Must enable]Blocks transactions Stripe's AI classifies as "highest risk". This is the baseline rule.
-
Block if CVC verification fails based on risk score→ [Recommended]Blocks transactions that are both risky and have a failed CVC check.
-
Request 3DS if 3D Secure is supported for card→ [Optional]Forces 3DS verification whenever the card supports it. Maximum safety — liability for disputes shifts to the issuing bank after 3DS — but it slightly hurts conversion. Conversion-sensitive businesses can use custom rule 1 below instead.
Add the Core Custom Rules
Click + Add rule in the top right and add these four rules:
Rule 1: Force 3DS on elevated-risk transactions (security/conversion balance)
Leaves low-risk legitimate customers alone; only demands 3DS when a transaction is scored as elevated risk. Once 3DS passes, chargeback liability shifts to the issuing bank.
-
Action:
Request 3DS -
Rule code:
Request 3D Secure if :risk_level: = 'elevated'
Rule 2: Block on failed CVC check (hard block)
Legitimate cardholders almost never get the CVC wrong; a failed CVC is a strong signal of credential stuffing or card testing.
-
Action:
Block -
Rule code:
Block if :cvc_check: = 'fail'
Rule 3: IP country ≠ card country + elevated risk score
Blocks the vast majority of cross-border fraud behind VPNs/proxies (e.g. a US-issued card, but the request IP is in another country and the risk score is elevated). The IP mismatch alone would hurt travelers and remote workers, which is why the risk-score condition is stacked on top.
-
Action:
Block -
Rule code:
Block if :ip_country: != :card_country: AND :risk_score: >= 65
Rule 4: Block on high risk score
:risk_score: is the fraud probability (0–100) Stripe's ML model assigns to every transaction. A score of 75 or above usually means the transaction is almost certainly fraudulent.
-
Action:
Block -
Rule code:
Block if :risk_score: >= 75
3. Frontend Defenses Against Card Testing
If your site gets hit by automated card testing, relying on Radar alone drives your screening bill up — Radar charges per screened transaction even when it blocks. Stop the junk before it reaches Stripe:
-
Add Cloudflare Turnstile or reCAPTCHA to your checkout and card-saving pages.
-
Apply IP rate limiting to payment-related API endpoints.
4. Checklist
A quick final check:
-
✅ Radar screening for saved payment methods (SetupIntents) stays ON
-
✅ Subscription screening skips after 2–3 consecutive successful payments
-
✅ Upgraded to Radar Plus for custom rules
-
✅ 3 default high-risk rules + 4 custom rules enabled
-
✅ CAPTCHA on payment pages + API rate limiting
Once everything is in place, revisit Radar → Insights every few weeks and backtest the thresholds (65/75) against real traffic to see if they need tuning.